For AV teams and stage crews, a misplaced projector can extensively ruin a live scene on stage. Hence, considering the throw distance is a core design choice. It helps in deciding where the projector must sit.
An ideally placed projector will help you control image size and brightness, besides deciding whether actors cast shadows.
On stage, the throw distance also affects rigging, sightlines, stage look, and camera shots. Thus, it is crucial to decide between rear projection and front projection. However, choosing rear projection vs front projection on stage often comes down to backstage depth.
Therefore, we bring you a detailed guide on Rear vs. Front Projector comparison. The guide explains all about the throw distance and ambient light for stage projection. It also highlights how a projector throw ratio calculator can streamline stage projection and reduce rework.
The Basics: Throw distance, Throw ratio, Aspect Ratio, Brightness, and Screen Size
Let’s understand the basics before diving into the rear vs front projection comparison:
Throw distance & Throw ratio
Throw distance refers to the distance from the projector lens to the screen. You can calculate it as the product of the throw ratio and the image width of your projected screen.
Throw distance = Throw Ratio × Image Width.
As a result, the throw ratio equals the ratio of throw distance to the image width.
Pro Tip: Always use image width, not diagonal, for calculation.
Aspect ratio
Aspect ratio defines image shape by the ratio between image width and height. The different types of aspect ratios are 16:9, 16:10, 4:3, and 21:9. A bigger ratio will increase the screen width for the same diagonal and raise the required throw.
Pro tip: You must match content format, screen shape, and sightlines so the action stays visible from the house. Confirm seating sightlines before you fix aspect and size.
Brightness & screen size
Brightness refers to the amount of light a projector can produce, affecting image visibility and quality. But screen size is the diagonal distance from one corner of the screen to another.
Pro Tip: The projector brightness for the stage reduces as the throw distance increases because light spreads.
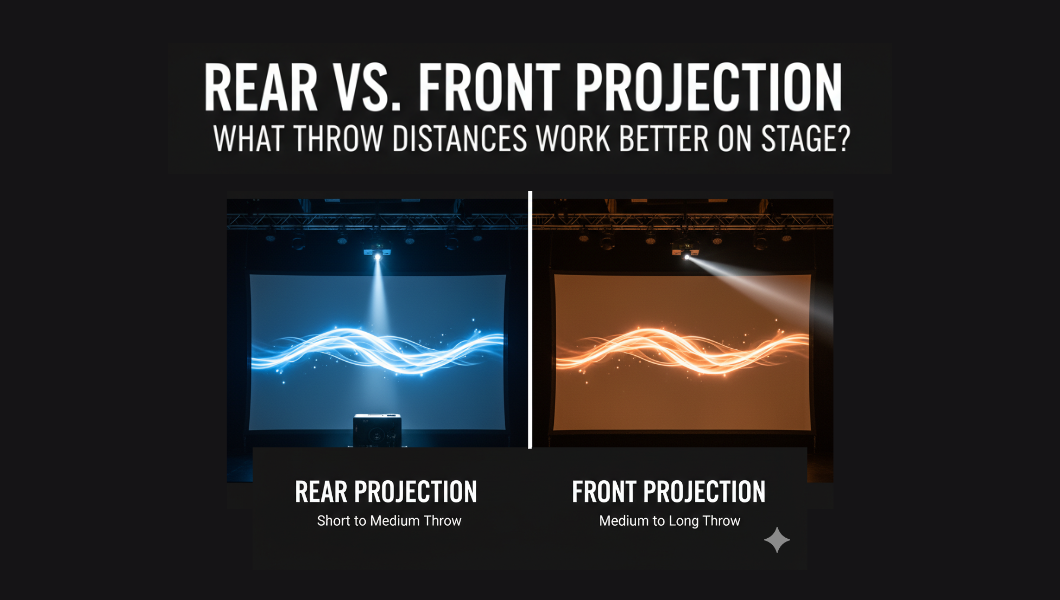
Front projection: what throw distances buy you (and cost you)
Front projection offers bright, direct images and simple screens. You often mount projectors in FOH, on trusses, or on ceiling grids. This setup boosts perceived lumen delivery and simplifies screens. You must plan sightlines and lighting carefully to avoid shadows and beam glare.
How it works / Mounting
You must mount front projectors above the audience or at FOH. You choose mounts as per the projector weight and venue conditions. You must ensure that the beam path clears walkways and set pieces.
You can use lens shift and zoom to center the image without the digital keystone. You must also plan space for maintenance access and projector cooling.
Throw behavior
You must point the projector at the front systems so that the light reflects off a front-surface screen. The audience then sees the reflected image from the front surface. This reflection gives a higher perceived luminance per lumen than transmissive rear systems.
You must keep the beam path clear of performers and scenery. If people cross the beam, you must plan alternate angles or use short-throw optics.
Pros
- You get stronger perceived brightness per ANSI lumen with front projection.
- You can buy simpler screens and save on screen material costs.
- Mounting is flexible, and maintenance is easier for your crew.
- You can use ALR screens to preserve contrast under intense house lighting.
- Installation is quicker and less costly than folded-optic rear rigs.
Cons
- You risk shadows when performers cross the beam.
- The projector and beam may appear in camera shots.
- Strong stage wash can reduce image contrast noticeably.
- You may need higher-lumen projectors to compensate for the ambient stage lighting’s impact on the projection.
- Test on site with a demo unit and record lens settings and mount coordinates.
Rear Projection: Throw distances & tradeoffs behind the screen
For stages where performers move near the screen, rear projection keeps visuals uninterrupted and hides the gear. It places projectors behind a translucent surface, but it needs backstage depth or folded optics. You get shadow-free images and clean camera shots, yet you must plan extra lumens and screen transmission.
How it works / Mounting
You must rear projectors in a backstage alcove, projection booth, or plenum. You must plan for power, cooling, and service access so technicians can reach the unit. You can use mirror-fold optics to shorten the required depth. If space is tight, an ultra-short-throw unit behind the screen can be a practical option.
Throw behavior
You must project through a translucent or diffusion material so light passes to the audience. You must determine the screen type for rear projection transparency, gain, and diffusion. It helps in deciding the transmitted brightness and side viewing.
You can align optics precisely, as small offsets cause hot spots or soft edges. You must use lens shift and quality optics to ensure uniform focus.
Pros
- You can avoid performer shadows and visible front beams.
- You can hide hardware and cables for a cleaner stage aesthetic.
- Cameras capture scenes without beam glare.
- In venues with a projection cave, rear rigs can speed load-in and simplify cabling.
Cons
- Rear setups need more ANSI lumens because transmissive screens pass less light.
- They can reduce side-seat contrast and narrow viewing angles.
- Mirror-fold systems add cost and alignment time.
- You must allow ventilation and limit projector noise so audio is not affected.
- Validate exact throw and lumen needs with vendor tools like Epson and XTEN-AV, then demo on site and record settings.
How does throw distance affect brightness, optics & viewing angle?
Throw distance directly changes how an image reads on stage. Small moves can halve perceived luminance. For any rig, this affects readability under wash lights, camera exposure, and the lens family you must choose.
Brightness
As you push the projector farther from the screen, the same lumens cover a larger area. That reduces foot-lamberts and perceived contrast. Increase ANSI lumen targets for large throws or when stage wash is present. Always test brightness with house lighting in its typical state.
Rear-transmission loss
When you use a transmissive screen, some light is absorbed or scattered before it reaches the audience. That transmission loss forces you to spec extra lumen headroom. Check the screen’s transmission percentage and add roughly 20–40% margin when planning rear installs.
Optics
Selecting lenses defines reachable throw ratios, zoom range, and image consistency. Use lenses that provide adequate zoom and lens shift to avoid digital keystone. Ultra-short and short-throw lenses may reduce depth, but will also change focus behavior and hotspot patterns.
Viewing angle & screen gain
Higher screen gain raises center brightness but narrows the viewing cone. High-gain materials can cause hotspots for off-axis seats. Hence, you must balance gain and viewing angle to protect side-seat contrast.
Practical guidelines: Step-by-step projection for integrators
- Measure available space: Record front and backstage depth, ceiling height, and service clearance. Include cable runs and ventilation space.
- Decide target screen width & aspect: Set screen width to match sightlines and audience FOV. Use width in throw math.
- Pick desired image size: From sightlines, decide image width and viewing distance objectives (audience comfort).
- Compute throw using throw ratio: Use Throw Distance = Throw Ratio × Image Width. Use the most significant ratio in the lens zoom range for worst-case clearance.
- Confirm projector & lens family: Check throw ratio range, lens shift, and zoom. Confirm physical offset and mount geometry.
- Choose front vs rear: If backstage depth ≥ computed throw + service clearance, then rear projection is viable. You must evaluate an ultra-short-throw projector for stage or mirror-fold rear options. It is essential if the depth is limited, but shadows are critical.
- Lumen sizing & lighting: Estimate ambient lux at screen. Select the projector ANSI lumens to meet the target foot-lamberts after screen gain/transmission.
- Validate with calculators and demo: Run vendor throw calculators (Epson, XTEN-AV, ProjectorCentral) and test with a demo unit on the target screen.
- Document placement: Record final mounting coordinates, lens settings, and service notes for repeatable installs.
Conclusion
In conclusion, you must match throw distance to stage depth and show needs as an AV integrator. You must also use Throw Distance = Throw Ratio × Image Width to pick the lens and mount.
Front projection gives brighter images per lumen, while the rear projection removes shadows and hides gear. Hence, you must choose front when backstage space is tight. But, you can choose rear when sightlines and camera shots must be clean.
You must also check the throw distance, throw ratio, and possible projection screen size with free-to-use online projector throw ratio calculators. It will streamline the workflow, reduce the manual errors, and be cost-effective by preventing expensive reworks.
So, get your measurements right, and you won’t ever have to worry about deciding between rear vs front projection.